A 7×8 bathroom measures 84×96 inches, or 56 square feet, if those are its finished internal dimensions. Start with a tub/shower combination or a shower-only layout. A double vanity is possible in the example with a side-wall entrance. A separate tub and shower needs closer scrutiny: the 60-inch tub and 36-inch shower shown below consume the entire 96-inch wall before any divider or installation allowance.
Choose what this bathroom needs to do
Think about a normal morning. Does someone bathe a child here? Do two adults actually use the sinks together? Is the toilet needed while somebody showers? A second sink is helpful only when it solves a real conflict; a longer counter or easier towel storage may be more valuable.
| Your priority | Start with | The decision to check |
|---|---|---|
| Keep a bath for soaking or children | A: tub plus one vanity | Alcove construction and bath/shower screen |
| Use the room mainly for showering | B: shower plus one vanity | Shower entry and glass-door movement |
| Share the sink area | C: double vanity | Side-wall access and real sink locations |
| Have a separate bath and shower | D: a constrained footprint study | Whether selected products and construction can actually fit |
These studies compare four arrangements, not every possible design. For a wider starting point, see our small bathroom layout guide. Here the focus stays on the particular opportunities and compromises of an 84×96-inch room.
Four 7×8 bathroom layouts to compare
Each drawing uses generic fixture envelopes: a 21-inch-deep vanity, a 30-inch-projecting toilet and nominal bath or shower sizes. The entrance is modeled as a 30-inch door. Its leaf width is not a verified clear passage width. Dashed zones show the planner’s simplified clearance overlays; they do not establish an accessible design or construction approval.
Open a drawing in the bathroom layout planner, then replace the examples with your room measurements. The plans do not include shower-door swings, tile build-up, window positions or cabinet pulls.
A: keep the tub and a useful vanity
Putting the tub across the short wall leaves 24 inches beside its nominal footprint. The 48-inch vanity occupies the right wall, with the toilet opposite. Across the room, the arithmetic is 84 − 30 − 21 = 33 inches between the toilet’s front and the vanity face.
That shared aisle is why this arrangement is a sensible first sketch for a family bathroom. It is not two separate 33-inch spaces: someone standing at the sink uses the same area as someone approaching the toilet. Test the routine with floor tape before deciding the aisle feels generous.
The 24-inch remainder beside the tub is not automatically a usable cabinet bay. An alcove bath may need a framed end wall, finish and an appropriate surround. For example, Kohler’s 60×30-inch Underscore has an integral flange and apron; its specification sheet calls for measuring the actual product for rough-in details. Choose the bath and enclosure before assigning that corner to storage.
B: replace the tub with a shower
This arrangement uses a shower six inches deeper than the tub in A, so the toilet and vanity move six inches toward the entry. Their facing gap remains 33 inches. The model’s 60-inch distance from the shower front to the opposite room wall is a geometric measurement, not a promise that its whole entrance will remain unobstructed.
Choose the glass and opening position next. A hinged screen can occupy floor that looked empty in the plan; a sliding system has its own opening width, track and cleaning considerations. A 60×36-inch base also does not guarantee a 60×36-inch usable shower interior.
This is a useful direction when nobody needs a tub in this bathroom. If replacing an existing bath, compare the drain position and waterproofing work rather than assuming the change is a drop-in swap. Our shower size guide explains the difference between nominal footprint and usable space.
C: put two sinks opposite the shower
The 72-inch vanity sits along the lower wall, while a 48×36-inch shower and the toilet share the upper end. There are 39 inches between the shower footprint and vanity face: 96 − 36 − 21. In front of the shorter toilet projection, the model has 45 inches.
The two drawn sinks are 36 inches apart center to center. That is an assumption about this sketch, not a specification for every 72-inch vanity. Check the actual bowl locations, counter overhang and drawers. A 72-inch cabinet on an 84-inch wall leaves 12 inches total; this drawing divides it into a 3-inch gap and a 9-inch gap.
Moving the entrance to the long wall enables this particular arrangement. It does not prove a double vanity is impossible with any end-wall entrance. If relocating the door means structural or plumbing work, compare that expense with a single sink and better counter space first.
D: understand the separate-tub-and-shower constraint
This is the tightest option. The tub and separate shower stack along the left wall, with a 48-inch vanity at the top and the toilet at the bottom. The generic rectangles do not overlap, but the wall calculation is 60 + 36 = 96 inches. There is no spare length assigned to a divider, framing, tolerances or a different installed product size.
The sketch also leaves only 24 inches between the shower front and the side of the toilet footprint; the toilet centerline sits 15 inches from the right wall. Those dimensions deserve particular attention when selecting an enclosure and reviewing local requirements. A shower door is not drawn, and the plan does not resolve how every product edge is constructed.
Treat D as a question for your designer, not a shopping list. If the required assembly will not fit, reconsider the product sizes, enlarge the room where feasible, or return to A with a shower over the tub. The separate tub and shower guide compares alternatives with more room for installation details.
An exact sum leaves an unanswered installation question
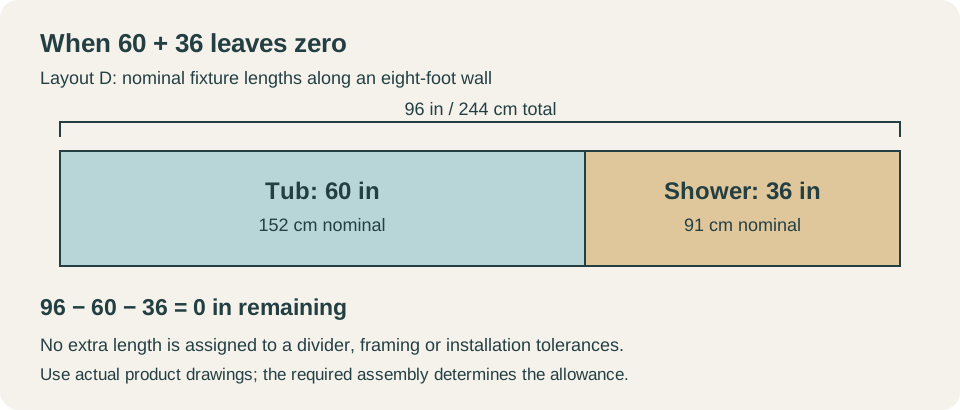
First establish what your room measurement represents. An 84×96-inch dimension taken between finished walls is different from a framing measurement before backer board and tile. Then use the product’s installation drawing to locate the flange, drain, enclosure and required supports. Avoid subtracting an arbitrary wall thickness from one measurement while treating the other as finished.
Watch for doors that compete for the same floor
In baixu’s bathroom-layout video, around 4:26–5:12, an entry door and shower door swing into the same area. It is a useful visual check for these compact plans: draw both openings, then imagine somebody standing between them.
A pocket door may help a particular room, but the wall must accommodate its frame and services. Moving the collision elsewhere is not a solution. Include the room outside the bathroom when checking an outward-opening door.
Test the plan before you order
- Measure the fixed details. Record finished wall lengths, door position, windows, drain locations and any boxing or sloped ceiling.
- Place the operating space. Draw shower screens, vanity drawers and door handles, then mark where each person stands.
- Check storage without narrowing the route. Towels and toilet paper need reachable homes; a tall cabinet added later can consume the aisle you planned.
- Review the actual assembly. Take your chosen fixtures and installation drawings to the person responsible for the design and local approvals.
NKBA’s planning guidance recommends 30 inches of clear space in front of fixtures as a design target. The linked edition references older model codes, so it should not be treated as confirmation of the rules adopted in your location. The planner is a comparison tool; site conditions and product instructions still control the final design.
Final Takeaway
For a 7×8 bathroom, start with A if you need a tub or B if showering takes priority. Consider C when two sinks and a side entrance suit the household. Keep D provisional until the exact tub, shower and separating construction are resolved. The best option is the one that works with doors open and people using it.
Main Sources
- Kohler K-1956-RA specification sheet — nominal dimensions, flange and rough-in instructions.
- NKBA Bathroom Planning Guidelines — fixture space and door-interference guidance; this edition cites the 2015 IRC/IPC.
- baixu: Bathroom Layout Mistakes — visual door-collision example, not a measurement source.
Layout measurements are BathDraft calculations using the linked plans. Room area: 56 sq ft, approximately 5.2 m². Sources and model assumptions reviewed November 13, 2026.